The After-School Snack (Homemade Tortilla Chips and Salsa)

Every day when the kids get home from school, they interrupt me from whatever I’m doing - writing, prepping for dinner, talking with Mom about her cable bill - and ask for a snack. Knowing full well that I packed them a stellar lunch (at least I thought so), the daily challenge is to try to create a light, somewhat-healthy snack that will keep them satiated until dinner. And here’s the kicker – it’s gotta be quick. Prepared and served in 10 minutes or less.

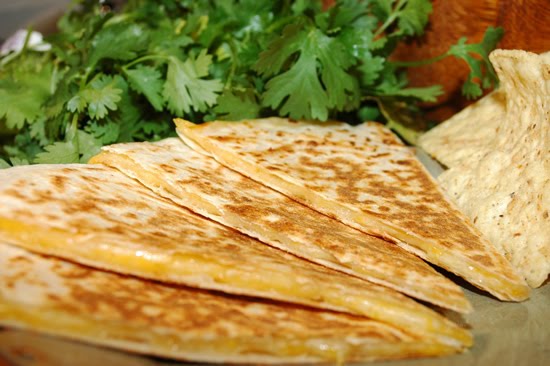
Today was no exception to the daily routine, so when Tommy assaulted me in the kitchen with a few of his friends (Kendal had cheer practice), I had to act fast. For a second I thought carrots and ranch might do the trick, but no, not when Tommy has friends over. He’ll complain. It’s time for Chef Mom to make some magic – homemade tortilla chips and (very) mild salsa.

What you’ll need:


1 Package of 6” White Corn Tortillas

½ Cup Vegetable Oil

2 Tomatoes, chopped

¼ Onion, chopped

1 Cup grated cheese (Monterey Jack, Colby, Mozzarella, or a cheese blend will do)


What you do:


First, and this is the hardest part, you’re going to have to get the oil at just the right temperature in a deep pan on the stove. I recommend setting the dial to about halfway between medium and high heat. If you have a fryolator, then use it, they’re the best, but for those of you who don’t, just make sure the oil doesn’t start to smoke. If it does, take it off the burner immediately.


Next, you’re going to cut your tortillas into fourths, making little triangle chips. Lay your tortilla chips in the hot oil, and flip them until they’re just starting to brown. Pull them off and lay them on a few paper towels to drain the excess grease. It’s OK if they’re a little underdone, they’re going in the oven soon.


While the oil is heating and the chips are frying, set the oven to 350 degrees F, and start chopping your vegetables. There are only two, I know, but my kids are picky (I have to chop my onions extra fine, so the kids can’t see them!)

Once your tortilla chips are fried and dried, arrange them on a baking sheet, and layer your cheese in, nacho-style. Place them in the oven for about 5-10 minutes, or until the cheese is nicely melted. Pull your crispy, cheesy tortilla chips out of the oven, put them on a serving platter, and spread the tomatoes and onions right on top (so the kids can’t avoid them!)

And there you have it - a simple, fast, and light snack that’s always a crowd-pleaser with the kids. Plus, it almost always holds them over until dinnertime (unless they’re making lunch trades that I don’t know about…)


Ta-da! - Lisa

Kid-Friendly Quesadillas

The cheese quesadilla: a certified classic. What could be better than a warm tortilla filled with gooey, melted cheese? I know Tommy can’t get enough of them, and I’ve actually got Kendal trying hers with peppers, tomatoes and onion (sometimes). There are countless combinations of cheeses you can use to recreate this dish (feel free to refer back to my cheese guide for ideas), but here’s a tried-and-true combo that my kids are quite fond of:


What you’ll need:


4 10” Burrito-size White Flour Tortillas

1/2 Cup Muenster cheese, shredded (do it yourself, please!)

1 Cup Colby cheese, shredded

1 Cup Quesadilla cheese, shredded


What you do:


With your pan set to low, lay your tortilla on an ungreased skillet. Without getting too close to the sides, distribute your cheeses evenly throughout. Let the open-faced quesadilla lay flat on the pan until the cheese at the edges just begins to melt, right before the tortilla starts to get crisp. Then, using a spatula, fold one half of the tortilla on top of itself. Flip regularly until the quesadilla is golden brown and the cheese is melted. Cut into fourths, and serve alone or with salsa (my kids hate sour cream, and start making vomiting noises at the sight of guacamole).


Bonus: Add some pieces of (cooked) chicken on top of the cheese to take this kid-friendly dish from snack to meal!

Let’s Talk Cheese

Have you ever wondered what they put in those prepackaged bags of shredded cheese that you find at the grocery store? Well this mother of two did, and what did I find? More than you want to know. Bottom line: don’t buy it. You might be thinking, “but Lisa, how will I purchase my cheese now? I don’t know anything about cheese…” Troubled reader, look no further. This being a tortilla recipe blog, I’m going to break down melting cheeses for you, so whether you’re trying to put anything other than American on your next cheeseburger, or looking to make your kids’ grilled cheeses a little more exotic, your no-nonsense guide to melting cheeses is finally here.

Without getting all cheese-nerd on you, there are a lot of categories when it comes to cheese. These include: hard, semi-firm, semi-soft, fresh, sharp, processed, and many more. When it comes to cheeses that melt, however, some do it better than others. For the purposes of this article, I’m going to stick to melting cheeses that are readily available in the States. These cheeses work great on burgers, grilled cheeses, tacos, burritos, quesadillas, nachos, paninis, pizzas, and more.

English/American Melting Cheeses:

Monterey Jack: Mild in flavor, with a buttery taste. An easy-melting cheese that is common in Mexican cheese blends, and often found on burgers.

Cheddar: The most widely known cheese in the world, hailing from England. Comes in many flavors and colors, but always melts. Be sure to check the age of these cheeses, the older they are, the stronger the flavor!

Muenster: This American cheese is very mild and soft, with an orange color. Known for its melting qualities, it is often found in tuna melts and in grilled cheese.

Colby: Sweet and mild in flavor. A soft, moist cheese that must be used shortly after its purchase, but an all-around great melting cheese from Wisconsin!

American: A soft, mild cheese, often sliced into squares. This cheese does not separate when melted, but you probably already knew that, didn’t you?

Swiss: An Americanized version of the actual product from Switzerland, this cheese is firmer than baby swiss and usually has large holes in it. It has a mild-to-medium nutty flavor, and typically melts in a very stringy fashion.

Mexican Melting Cheeses:

Oaxaca: A mild, string cheese commonly melted on top of cooked foods like nachos.

Quesadilla: A family favorite because of its soft texture and mild, creamy flavor. This cheese is famous for being the key ingredient in the famous Mexican dish of the same name!

Asadero: This cheese is similar to Oaxaca because it is made in the same string cheese style. This cheese has a stronger flavor than its relative, Oaxaca, but behaves similarly when cooked.

European Melting Cheeses:

Mozzarella: This cheese is a soft, mild cheese that is best served fresh, as it is high in moisture. This cheese is a staple in Italian cuisine, known for the way it melts, but be careful not to be fooled by its low-moisture, shredded and vacuum-sealed cousin – it’s never the same! This is a key ingredient in lasagna, pizza, and many Italian dishes.

Jarlsberg: This Norwegian cheese is similar to Baby Swiss in appearance, but with a sweeter flavor and greater density. This is a great sandwich cheese that is easily found in the States, and - you guessed it - is great for melting.

Provolone: Provolone cheese is an Italian all-purpose cheese that comes in many varieties. It is mild and creamy in flavor, and becomes rather stringy when it melts, making it a perfect sandwich cheese!

What Now?

Use this melting cheese guide to invent your own unique cheese blends for tacos, quesadillas, burgers, grilled cheeses, or any dish that could use some melted cheese goodness. Mix it up in the kitchen tonight - instead of making a bland turkey and American cheese sandwich, try some cheddar, provolone, or jarlsberg instead. If your kids are anything like mine, cheese quesadillas are always a hit, so if you're making the kids cheese quesadillas, try this tortilla recipe - it’s mild, different, and delicious!

How to Roll a Burrito

We’ve all been to that neo-Mexican restaurant with the minimalist décor and insanely overstuffed burritos. If you’ve been to this particular restaurant chain (not naming names, but it’s named after a smoked jalapeno), you’ve probably watched in horror as your overstuffed burrito gets cracked, seeps, tears, or splits under the shaky hands of an inexperienced burrit-ista. As soon as I see this happen, my heart melts. From here, you can A – double wrap the burrito, B – slide the contents into a new tortilla, or C – transfer into a bowl. You don’t want to do any of these things. You just want your burrito rolled right the first time. Should you wake up one morning saying, “hey, I can make my own burritos. Screw (insert name of burrito-chain here),” then be sure to read this. I’m going to walk you through the burrito rolling process step by step.

Both science and art, this crucial step in the burrito manufacturing process could very well make or break your entire burrito-eating experience. Follow these steps to ensure that your burrito will be rolled to perfection.


Step 1 – Make sure that you have the appropriate sized tortilla for the job.


If you’re rolling rice and beans, chances are an 8” tortilla will do. If you’re rolling rice, beans, meat, guacamole, sour cream, cheese, lettuce, tomato, peppers, onions, salsa, corn, squash, cole slaw, and whatever else you people will put in a burrito these days, then you probably want to go for the big boy, the 10” burrito-sized tortilla. Now that you’ve got the right tool for the job, let’s talk strategy.


Step 2 – Know your stuff(ings).


If you are going to be piling this burrito high with toppings, make sure you layer accordingly. Cheese should always be the first layer; on top of that should go your main ingredients, your rice, beans, and meat. Then you deal with the extras. But be wary of these extras, any wet toppings - salsas, sauces, even sour cream or guacamole - could be the downfall of your beautiful wrap-job. Be sure to drain salsas of any extra juices, and be sure to place the wet stuff closest to you as you stand in front of your tortilla, ready to roll.


Step 3 – The tortilla itself


Whether it’s spinach, white flour, whole wheat, sprouted grain, or sun dried tomato, you’re going to want to warm that wrap up before rolling, otherwise, you suffer a greater risk of cracks and tears. To do this, you can simply warm the shell up in a pan at low heat, or, if you like the steamed effect that you get at the restaurant, I suggest dampening two paper towels, placing your burrito between the two, and microwaving it for a minute. This replicates the steam-press effect that you’ll get at most major burrito chains.


Step 4 – The roll


Place your warm tortilla on a clean, flat surface in front of you. Pile your toppings near the middle, but slightly closer to yourself, and make sure you have them in the correct order! Now, you’re going to slide both of your hands under either side of the tortilla, like you’re doing the Macarena. Sticking with the dance analogy, feel free to give the burrito a little shimmy to slide the contents toward the center (seriously). First, make a small fold towards the center with the side of the tortilla closest to yourself - this will form the bottom of your burrito. Now, with one hand on the fold you just made, grab one side of the burrito and fold it in towards the center, then spin the burrito and continue rolling it in on itself from the fold you just made. A warm tortilla shouldn’t split on you, but be careful not to over-tighten your burrito. The end result should be a tubular burrito, with one closed end and one open one.


Congratulations, you’ve rolled a perfect burrito!


Now bite into that soft, warm tortilla and enjoy!

-Eric

Buy a Tortilla at a Retailer

Maria and Ricardo's Tortillas are available at the following retail locations:

CONNECTICUT
Edge of the Woods
Mrs. Green's Natural Foods

FLORIDA
Chuck's
Whole Foods Market
Wild Oats Natural Marketplace
Nutrition S'mart

GEORGIA
Good Nutrition
Brighter Day Natural Foods
Earth Fare
Nuts N Berries Natural Foods

MARYLAND
Roots Market
Glut Food Coop

MAINE
Royal River
Tamarind

MASSACHUSETTS
Harvest Coop
Guido's Fruit and Produce
Living Earth
Five Seventy Market
Cornucopia Natural Foods

NEW JERSEY
Organica
Whole Foods Market
Big Bear Natural Foods
Basics Natural Foods

NEW HAMPSHIRE
A Market Natural Foods
Philbrick's Fresh Market
Portsmouth Health

NEW YORK
The Mustard Seed
Feel Rite
Green Planet Grocery
Whole Foods Market
Health Smart of New York
Food for Health

NORTH CAROLINA
Earth Fare
Home Economist
Tidal Creek Coop

PENNSYLVANIA
Kimberton Whole Foods
Right by Nature

PUERTO RICO
Fresh Mart
Natural Food Center

RHODE ISLAND
A Market Newport
Alternative Food Coop

SOUTH CAROLINA
Earth Fare
Bay Naturals

TENNESSEE
Earth Fare

VERMONT
Brattleboro Food Co-Op
Healthy Living

VIRGINIA
Heritage Store
Ellwood Thompsons

WASHINGTON DC
Yes Organic Market